Yesterday’s post perhaps left us all feeling a bit deflated. So let’s get to the good stuff.
How is a boat re-pontooned?
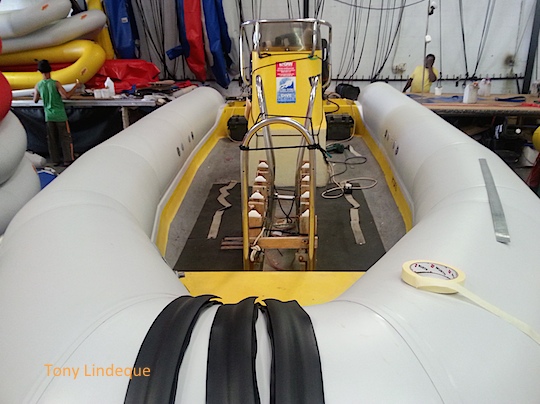
First, the glued attachment strips are heated and removed and the pontoons, still intact, are also removed. You can see just how little boat there is once they are off.
Step two is to open each section of the tube, separate the compartments and use them as templates to cut out the new ones. A huge cutting table is used as well as a whole range of markers, steel rulers and heat guns.

The company we used, Ark Inflatables, don’t glue the seams – they weld them instead. So the tubes are all welded together individually and assembled section by section, and then on they go. The pontoons are held to the hull by a series of attaching strips and are also glued to the hull where they meet. Once they are on and secured, they are ready for the third step: accessories.
The various options of what accessories to add require some special consideration. Ark are extremely flexible and helpful when it come to weird and wonderful customer requests. Depending on the use of the boat there are a wide range of options.
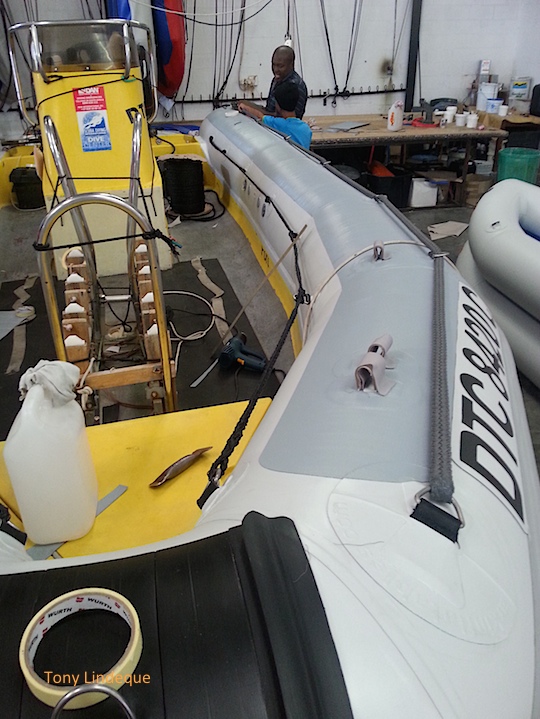
We use the jetties in Simon’s Town, Hout Bay and occasionally at Miller’s Point or Oceana Power Boat Club near the Waterfront. Some of these jetties are poorly configured for smaller boats, so pontoon damage and abrasions can be a huge problem. They are also primarily black rubber tyres or bollards to tie up against, and these mark the pontoons. To solve that problem we added four rows of rubbing trim.
We anchor at some of our dive sites and in order to set and retrieve an anchor without damaging the bow we added a really wide rubber buffer and rope channel.

Getting back into a dive boat can be challenging for some, so to ease that issue we added three lines to each pontoon section: a grab line to hold once you have surfaced and reached the boat, a top taut line to yank yourself up on, and a third line, to grab as you exit the water, on the inner wall of the pontoon. This line also serves as a secure place to place fins whilst the boat is underway.
Having spent most of my life around boats I know that anything you have onboard, if it’s not attached it’s going to the bottom, so there are around 25 D-rings on the boat for clipping off anything that you want to keep. An old issue with the boat before was the attachment of the bow rail: it would pop out if a diver was hanging on it, this now has a double set of attachments.
The top of the pontoons take a beating from the sun, people stepping on and off, and of course weight belts and cylinder boots. To solve this we added a second skin down the entire length of the pontoon and these will now be ”wear strips” that can be replaced if the are damaged.

Lastly, to maintain the correct pressure when the day time temperatures exceeed 30 degrees and the night time temperatures plummet, this coupled with a sudden cooling once you hit the water, we had them install an over pressure valve on each section, meaning it can never be pumped too hard and if left in the baking sun the excess pressure will bleed off.
Overall, I think it was a job really well done and would recommend Ark to any rubber duck owner wanting to repair their boat. The boat looks a little more ‘”industrial” than it did before, but the reality is it has a task to perform and must be able to do so faultlessly. Asthetics are secondary, but we feel the boat looks rugged, tough and ready to work. Oh, and did I mention… cool!


