Exploring: The shark exclusion net at Fish Hoek beach

The net, with a hand for scale

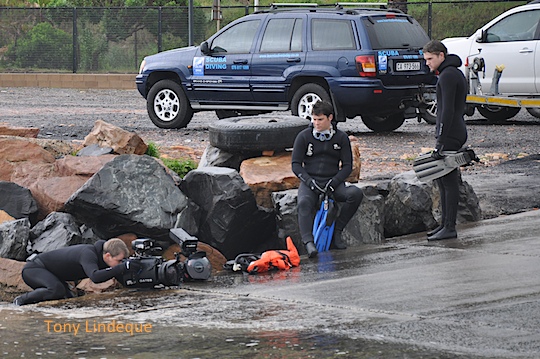
One Tuesday in early December, Tony escorted some members of the media – Murray Williams of the Cape Argus, and Bruce Hong of Cape Talk radio, on a dive along the inside of the shark exclusion net at Fish Hoek beach. It was just before the start of the school holidays, and since the net has been trialled multiple times by now and is working well, it’s a good time to raise awareness of the additional beach safety and – importantly – peace of mind that the net offers. I tagged along as photographer.

Over-under view of the exclusion net at Fish Hoek

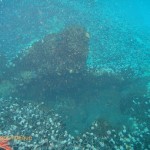
The net at Fish Hoek beach is a world first. It has a fine mesh that is highly visible underwater, and is designed not to catch anything – unlike the shark gill nets in KwaZulu Natal. The net is put out in the morning and retrieved at the end of the day, but only when sea conditions allow it. The south easterly wind can bring huge quantities of kelp into Fish Hoek bay which would foul the net, so when there is a strong south easter the net cannot be deployed.

If you’re a water person, please educate yourself on how the net works, and its intention, and share it with your friends. Even now, nine months after the trial started, I hear uninformed comments from people who have not bothered to do any reading about the net, and assume it’s the same kind of net as the ones in Durban. It’s not. The whole idea is that nothing – no sharks, no humans, no klipfish – gets hurt. Shark Spotters and the City of Cape Town have been very clear on this from the start. I had a bit of a rant about this late last year.

Murray dives down to check out the exclusion net

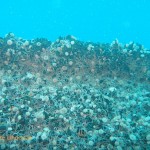
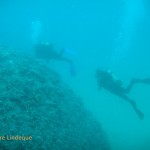
I digress. We went to the beach, got suited up, and went to check out the net. It was spring low tide, so at its southernmost end we were in about 2 metres of water. The net is high enough that when the tide comes in and the yellow floats rise with the water level, it simply unfurls further downwards, making an unbroken curtain. The lower portion of the net rests on the sand, with two parallel weighted lines to ensure that it lies flat. You can see that in the photo above Murray is gripping one of these leaded lines, and that there is a fairly large amount of net waiting on the sand for higher tides.

Murray and Monwa discuss the net

We stuck close to the net, and didn’t see much marine life on the sandy bottom. I spotted a large sand shark (when I say I “spotted” him, I mean that I almost landed on top of him). We were mutually surprised, and he zipped away into the bay, sliding neatly under the bottom of the net. I also saw a box jelly cruising along the net. Given my recent history with box jellies, I kept clear! The sea floor in the area where the net is deployed is level, sandy and free from rocks. There’s more life on the catwalk side, where beautiful rock pools wait to be snorkelled.

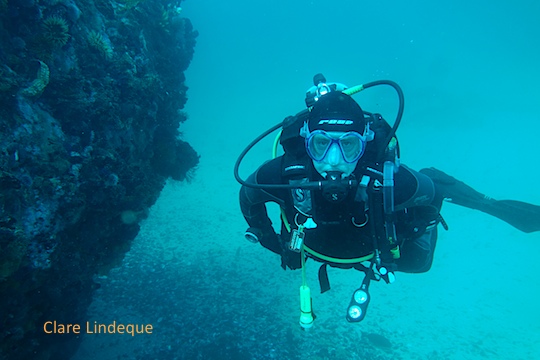
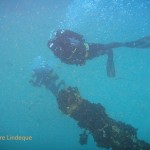
We were accompanied by Monwabisi Sikweyiya, who is the Field Manager of Shark Spotters. He is a hero and I always feel a bit star-struck when I see him (although he has no idea why – he probably just thinks there’s something wrong with me). He swims along the net regularly – someone does each time it is deployed, actually – to make sure that it’s released properly and hanging straight down.

After the dive
After the dive

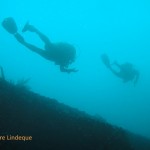
Swimming inside the net is completely voluntary. When a shark is seen in Fish Hoek bay the Shark Spotter still sounds the siren and the flag is raised to clear the water. The Shark Spotters team are still waiting to see how a shark will respond to the net when it swims close enough to be aware of it. So far none of the local sharks have come close to the net, as the summer season when sharks move inshore has only just started. Tony was half hoping that we’d be swimming along inside the net, look out through the mesh – and blammo!  – see a great white shark. But we had no such luck, if that is the right word.

You can read the article that Murray Williams from the Argus wrote after the dive, here.

Dive date: 3 December 2013

Air temperature: 22 degrees

Water temperature:  17 degrees

Maximum depth: 2.3 metres

Visibility: 4 metres

Dive duration:  25 minutes

Handy hints: How to be an awesome underwater cameraman

First, be completely unmoved by the curious looks from people nearby.

Craig and Mark wondering what Mark van Coller of Atlantic Edge Films is doing crouched on the slipway

Make sure your fins are within easy reach and that your weight belt is secured. Then, lie on the slipway and wait for the tide to come in, of course!

Lying on the slipway

The cameraman, Mark van Coller, is awesome, so you should follow his advice. You can look at some of his work here.

Mark with his camera gear in Hout Bay

He was in Hout Bay to film the Jan Braai television insert about the world’s first underwater braai.

Diving Photographer’s Reef

Photographer’s Reef is a lovely little reef quite close to Simon’s Town. It is eminently suitable for Open Water training, as it has a maximum depth of about 15 metres at high tide, and an excellent first boat dive site as it is close enough to land to give a feeling of comfort to new divers. This is a very short clip I took one day in early August, when a group of six of us dived this picturesque reef. You can see that the visibility is good; my camera skills, not so much!

[youtube=”http://www.youtube.com/watch?v=7q-_o6vFbGE&w=540″]

Dive sites (Durban): Bikini

A raggy scorpionfish

Unfortunately my dive on Bikini – the second one I did in Durban – was really horrible, as my mask kept flooding (I think I had hair caught under the skirt). After a while fighting off the feeling of imminent drowning became too exhausting, and I surfaced early. I didn’t take many photographs, but what I remember of the creatures on view is that they were many and varied – geometric moray eels, lionfish, scorpionfish, nudibranchs, a frogfish and the other usual suspects found on South Africa’s east coast. I took so few photos that I’ve borrowed a lovely one that Maurice took of said eel. Here it is:

Geometric moray eel saying hello

The reef structure was much like we see at Sodwana, made of sandstone with potholes and little overhangs. I saw mostly soft corals – none of the big plate corals that are common in southern Mozambique and beyond. This reef is part of the Blood Reef system that stretches along parallel to the Bluff. The reef system got its name because the old whaling station used to pump out blood and offal from slaughtered whales into the ocean, causing the reef to thrive and supporting an impressive population of oceanic white tip sharks. We didn’t see any sharks – I’m sure they were all too busy being killed in the gill nets off the Durban beaches to come and visit divers.

Blackspotted (I think) blaasop

Bikini Reef is small, and covers the good bits (this is allegedly the origin of its name). It’s a regular haunt of pineapplefish, but the current was going in the wrong direction for us to comfortably visit the overhang that many of these fish frequent. We had a pleasant drift dive (mask issues aside) and an easy introduction to the Blood Reef complex.

I should mention that my Durban photos are mostly questionably lit and poorly executed because I am using a new camera, and prior to the Durban trip had only done two dives with it! Hopefully matters will improve so I don’t have to revert back to my trusty Sony DSC-TX5. I’m still using the Ikelite AF-35 strobe, though (not that it’s much in evidence here).

Dive date: 19 June 2013

Air temperature: 23 degrees

Water temperature: 22 degrees

Maximum depth: 23.5 metres

Visibility: 20 metres

Dive duration: 28 minutes

A Day on the Bay: Distant dolphins

Date: 26 February 2013

Kate, Craig and Mark on the jetty

Late in February we took an afternoon boat ride down to the broadnose sevengill cowsharks near Miller’s Point. I had students, so Mark skippered for us. The inimitable Kate had arrived from the UK a few weeks ago and wasted no time making trouble!

Craig and Kate disagree mildly

We were fortunate to see some dolphins in the distance on our way back from the dive.

Watching dolphins
Watching dolphins

It was late afternoon by the time I took the boat home. On the way past the wreck of the Clan Stuart I had to stop and take a photograph as the sun was setting.

The Clan Stuart at sunset

If you’re wondering why every photo looks as though there’s a cloud of tiny black bats in the background, it’s because the sensor on my camera was BADLY in need of a clean. Thank you Orms for sorting it out!

Dive sites: MV Katsu Maru

The MV Katsu Maru is a 40 metre long Japanese trawler, now lying approximately 30 metres south west of the MV Aster in Hout Bay. On days with good visibility, which has been the case both times I’ve dived her, you can sometimes see both wrecks at the same time.

Unfortunately both dives I’ve done on the Katsu Maru featured misted up camera housings. This was connected to the excellent visibility; the sea was icy cold thanks to the upwelling that follows a south easterly wind, and the air was hot. My camera didn’t like it and I am used to the easy conditions in False Bay that allow me to be fairly cavalier about keeping my housing cool between dives. These photos therefore don’t show the ship in quite the same way as I saw it. But hopefully you get the idea.

The keel of the Katsu Maru

The wreck lies on her side, with her superstructure half buried and the bottom of her hull angled slightly upwards. There is a distinct keel strip running the length of the ship. To me she looks like nothing so much as a submarine when viewed from behind. When one swims around the wreck, the remaining superstructure can be seen and her funnel is revealed.

The trawler sank after sustaining a hole on her port side, which is visible as she is resting on her starboard side in the sand. The wreck has been there since 1978; about sixteen years later the Aster was stripped and scuttled nearby to join her. The relative positions of these wrecks makes them ideal for a rebreather dive (in drysuits) or a navigation dive from one to the other. I’ve been on the boat with divers who have attempted to cross the 30 metre gap from the Aster to the Katsu Maru in poor visibility, and have spent a delightful dive on the sand. The proximity of a sewerage outlet pipe adds a delightful element of risk to this strategy.

Anemone on the Katsu Maru

If you swim into the scour at her stern, you’ll get about 28 metres. I spent most of the dive on top of her hull, at about 16 metres. Limited penetration of the wreck may be possible, but it is probably a stupid idea (and if you’re not trained to do it, it’s definitely a stupid idea).

There isn’t an enormous amount of striking sea life on this wreck, but I think it’s my favourite one in Cape Town simply for the way she’s lying. Nothing makes me feel as though I am really taking full advantage of the three dimensional movement that diving offers as much as swimming along what is actually the bottom of a ship.

Dive date: 9 February 2013

Air temperature: 23 degrees

Water temperature: 9 degrees

Maximum depth: 25.4 metres

Visibility: 15 metres

Dive duration: 24 minutes

Adding a strobe: the Ikelite AF35 Autoflash

Proper underwater photographers, having viewed the quality of my normal photographic output, may argue that me enhancing my camera set up (currently just a Sony DSC-TX5 with an MPK-THJ housing missing one small bit of rubber) would be like putting lipstick on a pig (not sure who or what the pig is in this analogy). It’s still a pig, at the end of it all. This was my suspicion too, but with encouragement from those who believe in my limited abilities even when I don’t (how lofty does that sound – I’m talking about my husband here) I decided to try and get my hands on some sort of lighting rig to assist the Sony’s tiny, tiny flash. The loss of the aforementioned piece of rubber also meant that for close-up shots, there was a weird thing going on where the flash only fell on one side of the photo, because the now-uncovered metal rim around the flash diffuser on the housing caused it to reflect.

The Ikelite AF35 attached to my Sony camera housing

With assistance from Shannon at Orca Industries I acquired an Ikelite AF35 Autoflash kit. This wasn’t cheap – none of this stuff is – and cost about the same as my current camera and housing did when I bought them. (Of course a week after bringing them home I saw the camera and housing on special for 30% less elsewhere, but that’s another story.) However, it cost a lot less than a new and more powerful camera, which would have been my other option had I been able to justify and wangle it financially.

The AF35 is made to fit camera housings that don’t have the little widgets required for ordinary TTL (“through the lens”) strobe sensors, that usually sit just in front of the lens on the camera housing and are the size of pencil erasers on curly wires. You know the ones I mean. They tell the strobe how strongly to fire based on the available light. The sensor on the AF35 is the size of a large ice cube and is positioned on the strobe arm, and – forgive me for not using the correct words here, as this whole area of electronics is new to me – reacts fast enough that when the flash on your camera fires, the AF35 is activated while the shutter is still open.

Setting it up was embarrassingly easy – there are detailed instructions in the box, but basically I turned the dial on the strobe arm to 1, turned the strobe on at its head, made sure the camera housing was positioned next to the strobe arm, and pressed the shutter button. Voila! (If this doesn’t work, I think you’re supposed to turn the dial to 2, and try again. Or start at 5. The instructions have it.)

Yellow snapper in southern Mozambique

I used the strobe for the first time on our trip to Mozambique. It was fabulous. I’m still figuring out how best to position it to avoid backscatter (we did have some Cape Town-like visibility on some of the dives) but I got better results immediately. The three dimensional effect and bright colours are something to behold. For everything except really wide-angle far off stuff I used the strobe on the lowest setting, or on Auto (TTL – so automatic exposure adjustment). I found the Auto mode to be too strong if the subject of the shot filled too little of the frame, because the exposure level is determined by averaging across the entire frame. For things far off, such as leopard sharks, I cranked the strobe up to maximum and held thumbs.

This isn’t a very good set up for macro work (this probably isn’t news to you), but in some situations I was able to adjust the strobe arm to provide only a very little light to close up objects. Ikelite supply a little piece of rubberised black velcro to cover the flash diffuser on your housing – only a tiny bit of flash is required to trigger the strobe, and the idea is that you don’t actually need the additional contribution from the built-in flash. Once or twice I turned off the strobe and removed the velcro for a shot, but this is asking for trouble. That velcro is going to get lost. Fortunately they supplied five times as much as one needs with the strobe.

The Ikelite AF35 is made to fit a large range of compact camera housings, made by Sony, Panasonic, Olympus and Canon. It goes without saying that it also fits all Ikelite ultracompact housings, and some of their compact housings too. There’s a camera housing compatibility chart here but it didn’t help me at all as my camera housing isn’t listed. The strobe tray and arm comes with a set of little black plastic spacers, shaped like flat, chewy dog bone toys. You select the one that fits your housing, remove a strip of plastic to reveal some adhesive, and stick it onto the housing tray. The appropriate housing then screws onto the tray in such a way that you can open it without removing the strobe arm. The adhesive on the spacer is poor, and mine fell off after five dives. Fortunately I caught it, and I’ve set it aside until I need to unscrew my camera from the tray and replace it. When the housing is screwed on tightly, you can actually take the spacer off. Just keep it, because if you ever need to reassemble the set up you will need it.

When the flash (covered with velcro) fires and the strobe doesn't

In addition to the housing compatibility issue, you need to ensure that the camera you’re using emits a pre-flash. Most digital cameras do this apparently. It goes without saying that your flash needs to be turned on at all times in order for the strobe to fire.

The strobe uses four AA batteries. I used good quality rechargeables and probably got about 300 shots (in 25 degree water – I expect less in Cape Town) before the recycle time dropped to 10-15 seconds, at which time (1) Ikelite recommend you change the batteries and (2) the photographer gets somewhat cranky and impatient.

The housing plus camera varies between slightly positively and slightly negatively buoyant depending on depth of the dive, and with the addition of the strobe there’s hardly any noticeable difference. The tray and arm are more or less neutrally buoyant, and because the arm is bendy I can hook it over my forearm at the safety stop or while I’m unclipping it from my BCD next to the boat.

Here is some good reading on TTL, strobes, with more advanced stuff here – just look at all the technical stuff I’m still learning.

Dive gear maintenance: Cameras

Everyone I know has a different theory on what works for their cameras and funnily enough often very different and conflicting opinions work for different people. This is what I do…

Before you think “Wow, how clever!” please note that over the years I have, on arrival at the bottom, discovered the following:

  • no camera in the housing
  • no memory stick in the camera
  • memory card full
  • no batteries in the camera
  • flat batteries in the camera
  • more water in the housing than out of it

These things happen, but with proper care and planning you simply reduce the odds of a mistake.

Camera and housing
Camera and housing

Before a dive

Before a dive I assemble the unit by inserting fresh batteries and a formatted memory card. I use a lens pencil to gently rub the glass inside the housing and outside the housing using the soft rubber pad.

I then remove the O ring, wash it gently in shampoo or mild soap and allow it to dry. This is a good time to meticulously clean the groove on the housing with a soft lint free cloth so its ready to accept the O ring.

I then place a small blob of silicone grease in the palm of my hand and gently massage the O ring through the grease making sure it is all covered in a thin film of grease. I then fit it to the housing. Close the camera NOW as this is the time it will collect dust and other particles.

Turn it on at the surface, then go diving!

After a dive

After a dive, soak the camera housing with the camera inside (this makes the housing negatively buoyant so it doesn’t float on the surface). Keep the fresh water lukewarm and press all the buttons several times whilst the housing is submerged, especially the buttons you don’t often use underwater. My video camera has a filter and a wide angle lens and I remove these items from the housing and soak them all individually, carefully brushing the threads with a soft toothbrush.

Take the unit out of the water and try to lie it on a towel with the buttons facing down so the water will drain from the small recess in which the buttons, seals and springs are housed. This assists in preventing build-up in these small spaces that are hard to clean. If you are going to open the housing before it is dry avoid water entering the housing and try not touch the camera with wet hands.

I prefer to remove the O ring seal, twist it gently into a figure of eight and place it in the housing and then close it for storage. I feel this allows the seal to maintain its integrity as opposed to being squeezed during storage. I don’t like to leave the housing open but do prefer to store the camera in a sealed container in a cool, dark, dry place.

Shark “research”

It is true to say sharks are in trouble worldwide. Almost any attention to their plight is a step in the right direction. Sadly all too often the attention the sharks receive in the media is of little value to their plight and is purely an attempt to boost the participants’ perception of themselves as “great shark experts”.

This article describes a show that is a perfect example of this. It describes the National Geographic Shark Attack Experiment Live. Does the name make you skeptical? It should. The “experiment” sets out to show little concern for the sharks – a perspex cage was placed in the ocean that a shark would quite likely swim into and risk injury (and I am sure there would be no reporting on this if it happened).

The National Geographic Shark Experiment starts from a premise that comes straight out of Jaws: sharks want to eat people. The only refinement is that the experimenters planned to figure out what garnish they prefer. What is shocking is that the participants are all people who present themselves as being very concerned about sharks. This kind of so-called research is exploitative, tacky, and in poor taste – but, more fundamentally, it does nothing to remove the stigma associated with sharks as mindless predators. It panders to the Shark Week mentality of sharks as ravenous beasts with blood dripping from their jaws, tantalises viewers – exactly as Jaws did – with views of bikini-clad women swimming with apex predators, and has no scientific content whatsoever.

An assortment of other “experiments” were performed, such as dangling a string of plastic beads in front of a shark to prove a bling theory (who thinks this up? no one swims with a pearl necklace on). Once the diver dropped it the sharks followed it down and possibly ate it. The swimming and splashing surfer test was not done near great whites as this would “perk the interest” of any predator… So now reef sharks are no longer predators?

The best for me was diving with a dictaphone and making it seem like this was an earth shattering discovery. Divers dive with all these sharks all the time with video cameras, still cameras, video lights and strobes. What does a dictaphone do differently to all that other electronic equipment? Who swims with a dictaphone, anyway?

Science has proven sharks to most likely be colour blind and use contrast as a visual tool. Dispelling the myth of “yum yum yellow” whilst in a pink bikini is hardly a myth buster. It makes one fairly sure that the “science” was not actually the main feature here.

Pretending that three or four tests done by a single individual can help us to draw any conclusions about sharks is disingenuous and misleading to an often ignorant public who only know what the media tells them about sharks. Real science involves multiple tests, control groups, and the scientific method.

What we already know (real facts by unscientific people): thousands of divers worldwide dive with shiny, dangling scuba gadgets, strobes, cameras, bright shiny regulators, a multitude of brightly coloured fins, masks and wetsuits. Some dive in swimwear with bright shiny silver cylinders strapped to their backs. These people have black skin, pale skin, or bright red sunburned skin. A vast majority of them urinate in the water, their wetsuits and their swimsuits… And you’re more likely to be involved in a car accident on your way to the beach than you are to be bitten by a shark.

And yet, a respected (I think) institution such as National Geographic chooses to associate itself with a television special that takes, as its starting point, the view that sharks are looking for (appropriately dressed) humans to bite. How classy and scientifically up to date.

Dumb diving: How to drown a video light

Electronic innards
Electronic innards

A while back I mentioned the term “dumb diving”. For those that missed it, it is the term used when doing something whilst diving that is so stupid you can’t believe you were capable of it.

Well, my latest dumb dive was to Photographer’s Reef, with my video camera. I did a nice backward roll off the boat, and descended to the sea floor – only to find the batteries and cover of my video light had reached the sand before me. That’s DUMB!! Anyway, fortunately the batteries were out by the time the electronics got wet. This together with the fact that I surfaced immediately and gave the light to the boat skipper, who sprayed it with Q20, seem to have saved the light.

The video light taken apart

When I got home I stripped it completely, rinsed it in warm water, sprayed it with Q20 and then let it dry. After a few hours I cleaned it carefully with ear buds and assembled it. Hey presto – it worked. The batteries spent the dive in my pocket (DUMB!) and although they charged up again and still work the rust has started to grip them and I doubt they will last long. You can see the corrosion around the battery posts. The light is now back together again and working well. I was lucky this time as very few electronic items take well to exposed submersion.

Corroded batteries
Corroded batteries

I have also drowned other items. I have a Sony point and shoot camera with housing. The housing has leaked twice in the 10 years that I have had it. I think it is a good idea to replace the seal (o-ring) according to the manufacturer’s specification, usually a year, otherwise it will fail sooner or later. Sadly with digital cameras they upgrade and change shape faster than you can blink and it is not always as easy as replacing the camera and using the old housing. In both instances I have found a used camera on-line, as the new version did not fit the housing.

If you have had a DUMB DIVE post the details in the comments block.

Some of my examples:

  • Forgetting to put the memory stick in the camera
  • Forgetting to put batteries in the camera
  • Negative entry with a snorkel
  • Car remote in your pocket
  • Forgetting to remove the camera lens cover before putting it inside the housing (this is a Clare example)