Bookshelf: Scuba Professional

Scuba Professional: Insights into Sport Diver Training and Operations – Simon Pridmore

Have you ever wanted to run away and become a scuba instructor? Have you been intoxicated by promises of a lifestyle of tousled, barefoot, beach-based freedom from the rat race? Have you passed your instructor training course and are trying to decide what to do next? Or are you already a dive professional, perhaps looking to solidify your dive business, diversify your income streams, or branch out in the dive industry?

Scuba Professional
Scuba Professional

This is the final, and possibly most important, book in Simon Pridmore’s scuba trilogy (the other two are Scuba Fundamental and Scuba Confidential). Like the other two, it has much to offer – this time, to dive professionals and wannabe dive professionals.

Some of the topics Pridmore discusses are hard truths, such as the fact that becoming a scuba instructor is less about diving than about teaching. A person who doesn’t feel a vocation to teach should probably look for employment elsewhere in the dive industry rather than trying to attain instructor status. He devotes a whole section to teaching issues, many of which will be extremely useful to new instructors looking to move quickly up the learning curve.

An often overlooked feature of the dive industry is that there are many people who make a living from diving, but not by teaching students. Pridmore includes an incredibly helpful chapter in which he interviews several such dive professionals about their jobs, including a gear distributor, a photojournalist, a liveaboard cruise director, and a dive travel specialist. All of these professions include many of the positive aspects of the dive industry, and should provide inspiration for anyone who is keen on the underwater world but doesn’t necessarily feel the urge to teach.

For owners of dive businesses such as dive shops, charters or small training operations, Pridmore has much advice gleaned from running his own dive centre on the island of Guam. Many of his recommendations seem like common sense to anyone who has paid attention to the cycle of boom and bust that seems to characterise the dive industry in some locations, but they are hard-won insights that likely are only obvious after the fact. Unsurprisingly (perhaps?) several relate to safety considerations and gear maintenance. Many of the recommendations Pridmore provides are illustrates with anecdotes describing how he arrived at his viewpoint.

A whole section is devoted to developing a culture of safety in diving, something that featured in Scuba Confidential as well. It can be difficult to discuss dive safety and it seems to me that the industry doesn’t even try. None of the professional member forums I’ve attended, presented by training agency employees with access to incident reports, statistics and trends, has ever addressed dive safety directly. It would be tremendously helpful for instructors and divemasters to know that, for example (I’m making what follows up to make a point) most potential dive accidents happen on dive two of the Open Water course, during mask remove and replace, or during regulator recovery. Because instructors are obliged to report such incidents, training agencies know all about them.

Finally, the future of the dive industry comes under the spotlight, with a discussion of rebreathers (are they the future?) and the likely origin of the next wave of scuba diving students and tourists (Pridmore reckons, China). I was surprisingly moved (for a book about being a dive professional) by the chapter about dive tourism businesses, which concludes with the insistence that the only way a dive business in a remote, exotic location will flourish, is by involving the local community, training them to work in all levels of the business, and spreading a message of conservation that includes the people who live in the paradise in question. This kind of cultural sensitivity has not been the norm in many places, but where it is, the results are special.

Get a copy here (South Africa), here or here.

Suunto D6 in full panic mode (part II)

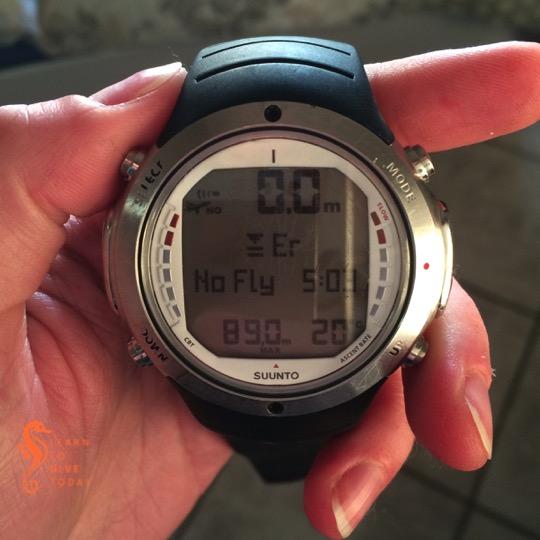
Yesterday I told you about a dive on Doodles, a reef in southern Mozambique, during our trip to Ponta do Ouro last month. Doodles has a maximum depth of about 14 metres. After forty five minutes’ dive time, my Suunto D6 began to register extreme depths (89 metres maximum), and to give various instructions about decompression ceilings and times, accompanied by strident warnings about exceeding my PPO2.

Suunto D6 after missed decompression

While annoying and potentially dangerous to lose the services of my dive computer mid-dive, it was also an excellent learning opportunity. Because I usually try quite hard to be safe and not to upset my computer, and dive within the conservative, recreational limits that I am trained for, I never get to see any of this behaviour from the instrument. (Fortunately the dive was shallow and I still had plenty of no-decompression time left so it was far from an emergency situation.)

After the dive, I soaked the computer in warm fresh water, and it gradually came out of dive mode over a period of about ninety minutes. During the course of this simulated ascent, the required decompression times and depths calculated by the algorithm were not adhered to, so the computer entered an error mode, which, according to the manual, indicates that “the risk of DCI has greatly increased.” (In fact, from all the beeping and flashing, I suspect the computer thought I was dead or close to it.) This error mode does two things: it disables the dive planning capabilities of the computer, and it locks you out of dive mode for 48 hours.

The D6 in gauge mode

I had never gotten the computer into this state before, so I was keen to see how it behaved when I took it on a dive in error mode. You can see in the photo above that I am wearing Tony’s Mares Nemo Wide (aka the flatscreen TV) to give me actual information about my no-decompression time, depth and dive time, but I took my D6 along for the ride. It is in gauge mode; this means it gives you only measurements, and is the setting a free diver might use.

The measurements available in gauge mode are: depth (18.4 metres in the photo above), the maximum depth you’ve been to on this dive (19.9 metres), an elapsed dive time (17 minutes), and water temperature (not shown) but it refuses to calculate a no-decompression limit for you. This would usually appear where the Er appears in the picture above.

Depth profile (with warnings)

For your enjoyment, here’s another screen shot of the dive profile from MacDive, with the warnings expanded. Click on the image to see it full size. It is clear that the first warning beeps I heard during the dive were because of elevated PPO2 levels. At 89 metres the device immediately put me in deco, and then as it “ascended” fairly rapidly, it gave a warning about oxygen toxicity (OLF or oxygen limit fraction as used in the Suunto algorithm) and an ascent rate warning. On the right, at about 10 metres, a warning is given that the depth is still below the required level to complete the decompression.

All the green circular icons appearing around the middle of my dive, where the computer thought I was at 35 metres, indicate that the computer registered that I surfaced, but not for long enough to show on the dive profile. Weird!

My D6 remained angry for 48 hours after the dive at Doodles; by this time, we had finished our diving for the week. I’m not sure whether the problem with the pressure sensor is a permanent one (requiring repairs, a service or a new dive computer), or whether it was just dirty or stuck and will have resolved itself next time I dive with the instrument. I’ll be wearing a spare dive computer when I do, just in case.

Re-pontooning

Yesterday’s post perhaps left us all feeling a bit deflated. So let’s get to the good stuff.

How is a boat re-pontooned?

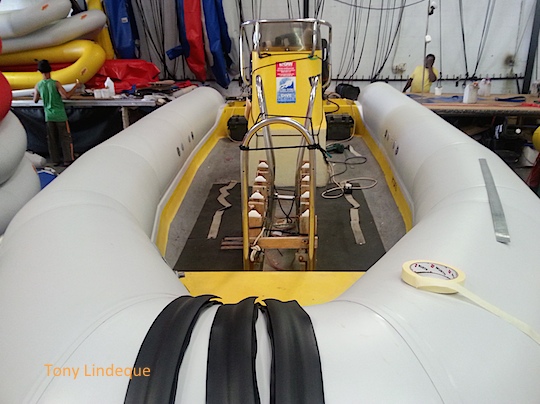
First, the glued attachment strips are heated and removed and the pontoons, still intact, are also removed. You can see just how little boat there is once they are off.

Step two is to open each section of the tube, separate the compartments and use them as templates to cut out the new ones. A huge cutting table is used as well as a whole range of markers, steel rulers and heat guns.

Pontooning in progress

The company we used, Ark Inflatables, don’t glue the seams – they weld them instead. So the tubes are all welded together individually and assembled section by section, and then on they go. The pontoons are held to the hull by a series of attaching strips and are also glued to the hull where they meet. Once they are on and secured, they are ready for the third step: accessories.

The various options of what accessories to add require some special consideration. Ark are extremely flexible and helpful when it come to weird and wonderful customer requests. Depending on the use of the boat there are a wide range of options.

We use the jetties in Simon’s Town, Hout Bay and occasionally at Miller’s Point or Oceana Power Boat Club near the Waterfront. Some of these jetties are poorly configured for smaller boats, so pontoon damage and abrasions can be a huge problem. They are also primarily black rubber tyres or bollards to tie up against, and these mark the pontoons. To solve that problem we added four rows of rubbing trim.

We anchor at some of our dive sites and in order to set and retrieve an anchor without damaging the bow we added a really wide rubber buffer and rope channel.

Front channel for anchor ropes

Getting back into a dive boat can be challenging for some, so to ease that issue we added three lines to each pontoon section: a grab line to hold once you have surfaced and reached the boat, a top taut line to yank yourself up on, and a third line, to grab as you exit the water, on the inner wall of the pontoon. This line also serves as a secure place to place fins whilst the boat is underway.

Having spent most of my life around boats I know that anything you have onboard, if it’s not attached it’s going to the bottom, so there are around 25 D-rings on the boat for clipping off anything that you want to keep. An old issue with the boat before was the attachment of the bow rail: it would pop out if a diver was hanging on it, this now has a double set of attachments.

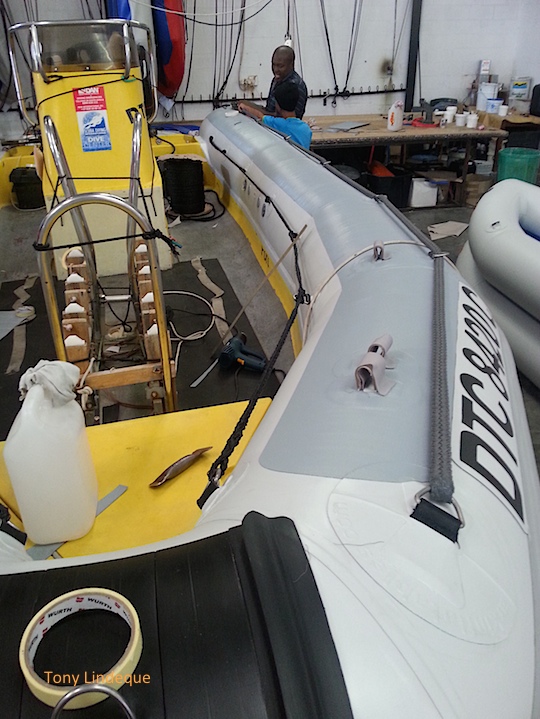
The top of the pontoons take a beating from the sun, people stepping on and off, and of course weight belts and cylinder boots. To solve this we added a second skin down the entire length of the pontoon and these will now be ”wear strips” that can be replaced if the are damaged.

Protective pontoon cover and ropes in progress

Lastly, to maintain the correct pressure when the day time temperatures  exceeed 30 degrees and the night time temperatures plummet, this coupled with a sudden cooling once you hit the water, we had them install an over pressure valve on each section, meaning it can never be pumped too hard and if left in the baking sun the excess pressure will bleed off.

Overall, I think it was a job really well done and would recommend Ark to any rubber duck owner wanting to repair their boat. The boat looks a little more ‘”industrial” than it did before, but the reality is it has a task to perform and must be able to do so faultlessly. Asthetics are secondary, but we feel the boat looks rugged, tough and ready to work. Oh, and did I mention… cool!

Maintaining a boat trailer

Having a boat that you transport by trailer to and from the ocean, as opposed to having a permanent mooring in your local yacht basin, adds a different element of maintenance to your plans.

For example a  boat on a permanent mooring has different requirements for cathodic protection, requires an anti-fouling coat of paint on the hull, and will need to be removed at least once a year for inspection, cleaning, and so on. Fresh water flushing of the cooling system doesn’t happen and the boat needs to be checked frequently for leaks, mooring line chafe, and so on. The plus side is you can step on the boat in the morning and be ready to head out to sea in a few minutes.

A boat that you haul to and from the ocean does not need a fancy hull paint, the standard engine protection in the form of sacrificial anode is more than adequate, and you get to wash the boat and flush the cooling system in your own garden. Hull inspection, running maintenance and the like is easily taken care of while the boat sits on the trailer in your driveway.

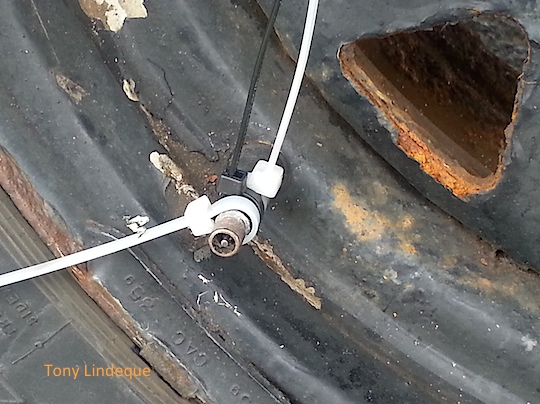
Rim looking ropy
Rim looking ropy

The trailer and its requirements that are often neglected, however. Not everyone neglects the trailer, but it is easy to overlook some of the basic items and then end up with an excruciating problem. I have had such a problem: on one occasion I put off changing the wheel bearings for a little longer than I should have, and on the day I decided to change them I had a failure on the way home. The bearing disintegrated, the wheel came off, wrecked the fender and left me stranded by the side of the road. It’s not fun. The potential for disaster is high and should the wayward wheel hit and injure someone you could face prosecution.

Rusty rim
Rusty rim

The moral of the story is check the wheel bearings frequently, and change them as soon as they feel or sound rough or there is excessive free play. Some advocate stripping them, washing them and repacking with fresh grease every month or two, and some prefer to fit a ”bearing buddy”. This can help diagnose the conditions, i.e. if the grease inside the cover goes white there has been water in it, and if it goes black it is tired and needs changing.

Having settled into an excessive routine of checking the bearings I noticed that the wheel rims were showing a lot more rust than I was comfortable with. I took them of for a clean up and repaint but discover that some of the pitmarks were so deep they were possibly just too risky. It was time to replace them.

Fortunately the option of galvanised rims is available and the cost is not too prohibitive, so that’s what we fitted. They should last longer than rims that aren’t galvanised, and will fight off the rust a bit better.

New galvanised rims
New galvanised rims

Newsletter: Best weekend weather

Hi divers

Weekend plans

We will launch tomorrow at 8.00 and 10.30 am to go to Roman Rock and to visit the sevengill cowsharks at Shark Alley.

On Sunday we will launch at 9.30 and 12.00, to visit Photographer’s Reef and the Ark Rock wrecks.

Please remember your MPA permits.

The forecast for the weekend is by far the best I can recall seeing in a while. No wild winds, no massive swells and the water is currently warm. Day time highs are under 24 degrees so the algae should stay away. I have quite a lot of students to dive this weekend so will not have too much extra capacity.

Sea fans at Roman Rock

DAN Day

There is a DAN Day  taking place on Saturday 17 May in Cape Town that looks to be very interesting. Talks include “Finding the lost diver” and “A Risk-Based Approach to Diving Operation Management”, as well as a tour of the Unique Hydra facility (which is where Andre works). If you want me to forward you the full email with details, let me know. Space is limited – sign up here.

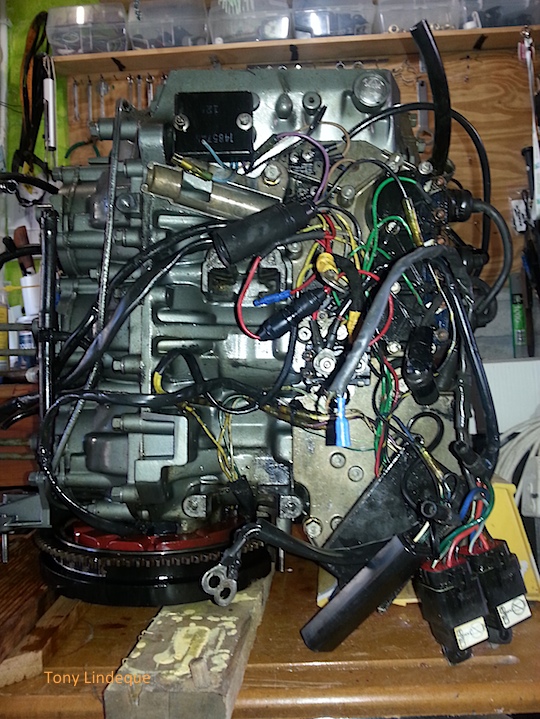
Stripping an outboard

French naval fleet

There are a few French naval ships, including an aircraft carrier, in Table Bay at the moment. They are supposedly open to the public for viewing but there seem to be endless complaints on the local radio stations about this not happening. Never mind, they leave on Tuesday and I will plan to launch early from OPBC to get a few pictures as they leave the Waterfront. Text me if you want to join me.

regards

Tony Lindeque
076 817 1099
www.learntodivetoday.co.za
www.learntodivetoday.co.za/blog/

Diving is addictive!

To subscribe to receive this newsletter by email, use the form on this page!

Boat maintenance

The slimy underbelly of our boat deck

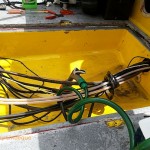
Mid September, the bilge pump below the deck of our boat became erratic so I lifted one of the deck plates to take a look. Turns out it was a really good idea as the hydraulic hoses for the power steering were rubbing against a bulkhead, and would have leaked sooner or later.

Whilst the area was open I decided to replace the fuel lines from the tank to the filter, and secure the control cables, wiring looms etc as they could also end up being chafed if they floated around loose for too long.  The last time I had this panel out was about 18 months ago when I installed the Lowrance Sonar and GPS units. In this time you can see how the fuel lines had become covered with an algae that was really slimy and would most likely have damaged the fuel lines if left unchecked.

I also replaced the wiring to the existing bilge pump and installed a second one as a back-up. The area is now clean, no loose cables or looms and ready to be closed up again.

All done!
All done!

Dive gear maintenance: Wrist mount gauges

I have a range of different wrist mount gauges as I teach a range of courses. Whether it’s a compass, dive computer, or timing device the same rules apply when it comes to maintenance.

They must all be soaked in warm fresh water after a dive.

Compasses

The bevel on the compass must be rotated several times in both directions whilst in the warm water. This prevents salt from building up underneath it.

Dive computers

Dive computers must have the buttons depressed several times while swirling the instrument in the warm water. This will ensure no salt crystals can build up behind the buttons. I have a Suunto Mosquito that has done over 1000 dives and has never given me a day’s trouble whereas many people have had button trouble with these units. If you have delicate water contacts brushing them with a soft toothbrush keeps them clear of build up.

I also take a soft cloth and wipe silicone over everything, pour it in behind the buttons and then wipe it all off with a clean cloth.

Dive computer in action

Dive gear maintenance: Cameras

Everyone I know has a different theory on what works for their cameras and funnily enough often very different and conflicting opinions work for different people. This is what I do…

Before you think “Wow, how clever!” please note that over the years I have, on arrival at the bottom, discovered the following:

  • no camera in the housing
  • no memory stick in the camera
  • memory card full
  • no batteries in the camera
  • flat batteries in the camera
  • more water in the housing than out of it

These things happen, but with proper care and planning you simply reduce the odds of a mistake.

Camera and housing
Camera and housing

Before a dive

Before a dive I assemble the unit by inserting fresh batteries and a formatted memory card. I use a lens pencil to gently rub the glass inside the housing and outside the housing using the soft rubber pad.

I then remove the O ring, wash it gently in shampoo or mild soap and allow it to dry. This is a good time to meticulously clean the groove on the housing with a soft lint free cloth so its ready to accept the O ring.

I then place a small blob of silicone grease in the palm of my hand and gently massage the O ring through the grease making sure it is all covered in a thin film of grease. I then fit it to the housing. Close the camera NOW as this is the time it will collect dust and other particles.

Turn it on at the surface, then go diving!

After a dive

After a dive, soak the camera housing with the camera inside (this makes the housing negatively buoyant so it doesn’t float on the surface). Keep the fresh water lukewarm and press all the buttons several times whilst the housing is submerged, especially the buttons you don’t often use underwater. My video camera has a filter and a wide angle lens and I remove these items from the housing and soak them all individually, carefully brushing the threads with a soft toothbrush.

Take the unit out of the water and try to lie it on a towel with the buttons facing down so the water will drain from the small recess in which the buttons, seals and springs are housed. This assists in preventing build-up in these small spaces that are hard to clean. If you are going to open the housing before it is dry avoid water entering the housing and try not touch the camera with wet hands.

I prefer to remove the O ring seal, twist it gently into a figure of eight and place it in the housing and then close it for storage. I feel this allows the seal to maintain its integrity as opposed to being squeezed during storage. I don’t like to leave the housing open but do prefer to store the camera in a sealed container in a cool, dark, dry place.

Dumb diving: How to drown a video light

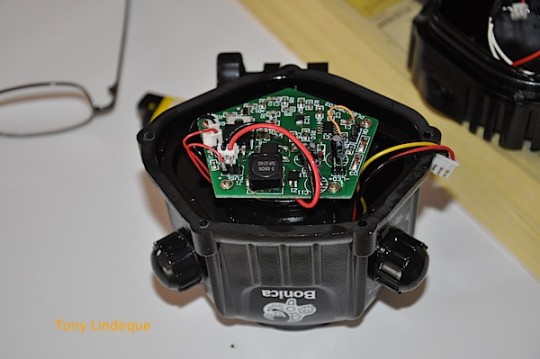
Electronic innards
Electronic innards

A while back I mentioned the term “dumb diving”. For those that missed it, it is the term used when doing something whilst diving that is so stupid you can’t believe you were capable of it.

Well, my latest dumb dive was to Photographer’s Reef, with my video camera. I did a nice backward roll off the boat, and descended to the sea floor – only to find the batteries and cover of my video light had reached the sand before me. That’s DUMB!! Anyway, fortunately the batteries were out by the time the electronics got wet. This together with the fact that I surfaced immediately and gave the light to the boat skipper, who sprayed it with Q20, seem to have saved the light.

The video light taken apart

When I got home I stripped it completely, rinsed it in warm water, sprayed it with Q20 and then let it dry. After a few hours I cleaned it carefully with ear buds and assembled it. Hey presto – it worked. The batteries spent the dive in my pocket (DUMB!) and although they charged up again and still work the rust has started to grip them and I doubt they will last long. You can see the corrosion around the battery posts. The light is now back together again and working well. I was lucky this time as very few electronic items take well to exposed submersion.

Corroded batteries
Corroded batteries

I have also drowned other items. I have a Sony point and shoot camera with housing. The housing has leaked twice in the 10 years that I have had it. I think it is a good idea to replace the seal (o-ring) according to the manufacturer’s specification, usually a year, otherwise it will fail sooner or later. Sadly with digital cameras they upgrade and change shape faster than you can blink and it is not always as easy as replacing the camera and using the old housing. In both instances I have found a used camera on-line, as the new version did not fit the housing.

If you have had a DUMB DIVE post the details in the comments block.

Some of my examples:

  • Forgetting to put the memory stick in the camera
  • Forgetting to put batteries in the camera
  • Negative entry with a snorkel
  • Car remote in your pocket
  • Forgetting to remove the camera lens cover before putting it inside the housing (this is a Clare example)